Firewalls, Proxies, and Whitelisting
Using Ninite Behind a Firewall
You can use Ninite if you are behind a firewall, but there are a few caveats you will need to be aware of:
Your agents will need access to our web servers so that they can appear in the web interface and be managed remotely.
Ninite gets updates from each publisher’s official download servers, which are outside of our control, and can change anytime. This makes it prohibitive to maintain a whitelist for those. Instead, if your firewall rules are strict, we recommend that you follow our Cache Server instructions to set up a machine outside of your firewall as the Cache Server, and have your agents impacted by the firewall use that Cache Server for their downloads.
Ninite’s Web Servers
For your agents to appear in the Pro web interface, they’ll need access to our servers. If you need to whitelist them for your firewall, this is the comprehensive list:
Setting Up a Cache Server
You may need to set up a Cache Server if your agents are behind a strict firewall, or if you want to keep the majority of your update traffic internal.
With a Cache Server set up, only one machine will be downloading updates from the internet, and then the other agents will use that Cache Server as the source for any updates, rather than going out to each publisher’s servers.
Please note:
Your agents will still need access to our servers.
The Cache Server will need to have the agent installed. This means it can’t be a share folder or NAS.
The Cache Server does NOT need the apps installed. It will simply handle the downloads for apps and updates needed by the other agents.
If you want machines to use the Cache Server only when it is available (such as when a laptop is in the office), but to use internet sources when the Cache Server is unavailable (such as when a laptop is out of the office), you can enabled the Cache Bypass feature.
Steps:
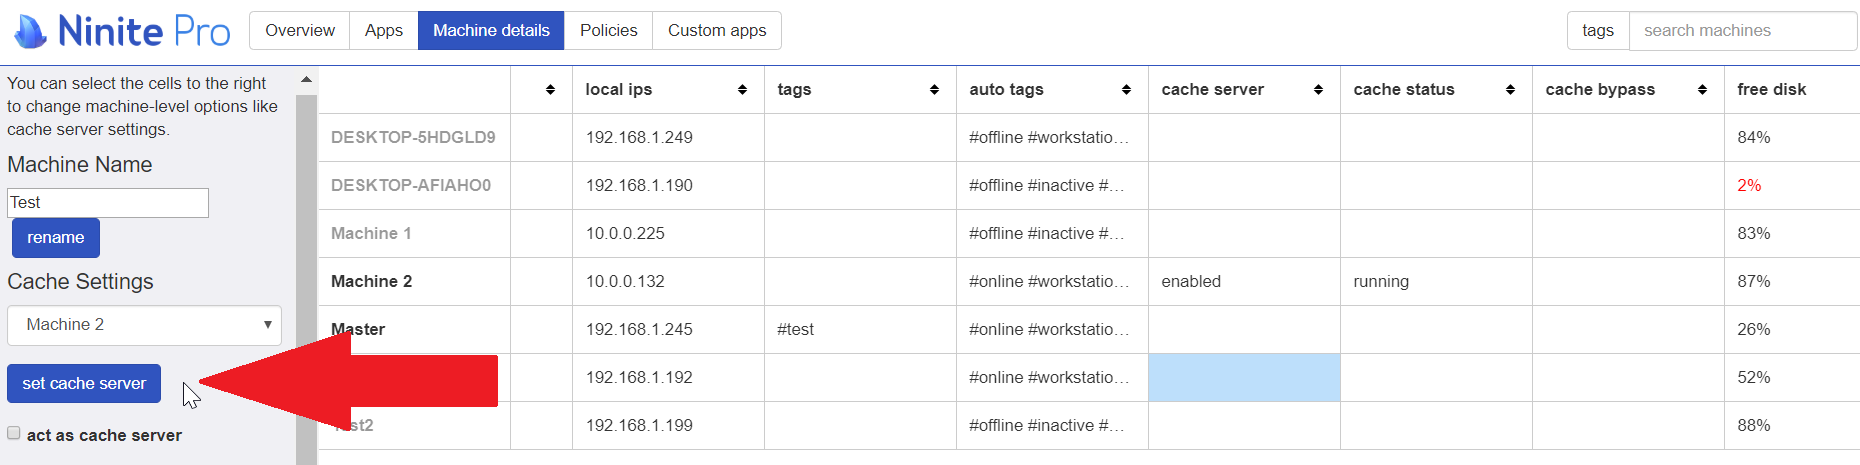
1. To designate a machine to act as the Cache Server, go to the Machine Details view and select one of the machines in your list by clicking on the cell for the Cache Server column (you may need to horizontally scroll some to get to that column).
2. You’ll see a section on the left menu for Cache Settings. Click the box for “act as cache server.”

3. To assign machines to use one of the cache servers you have created, you’ll follow the same process, but instead of checking the box, use the drop-down to select the cache server from the list. Then hit the button for “set cache server.”
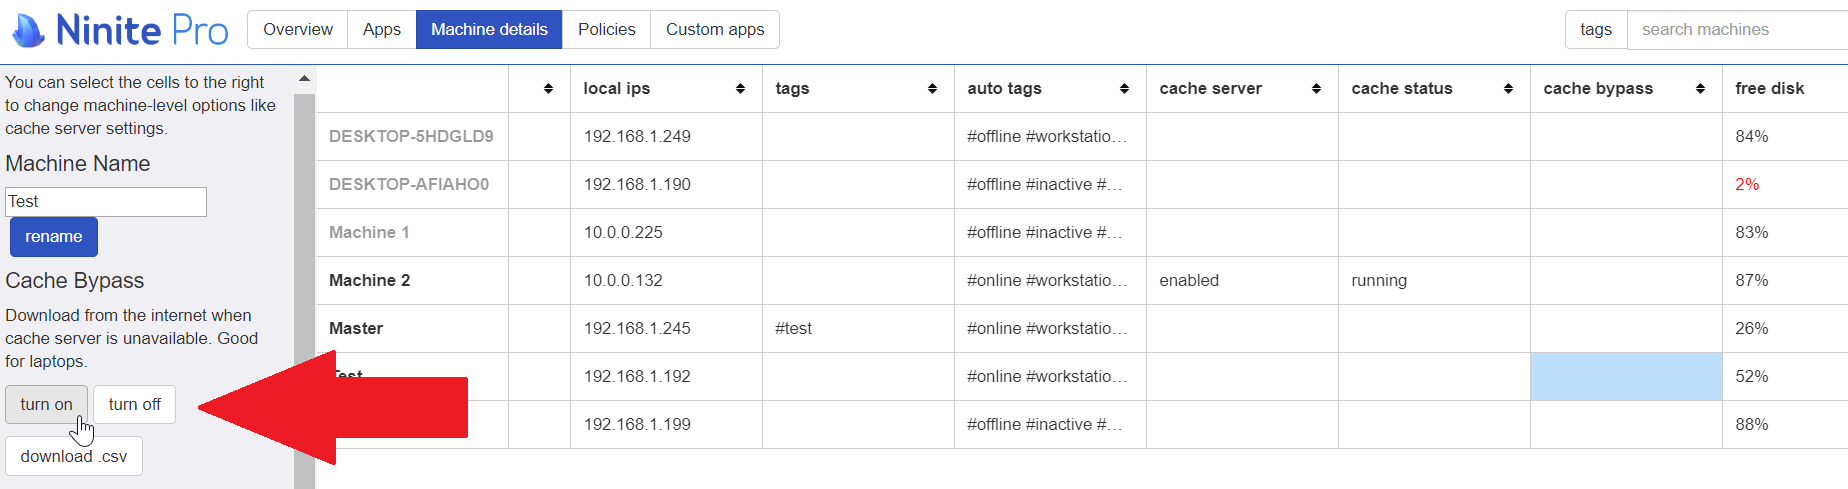
4. By default, if the cache server is unavailable, the updates will fail. But if you would prefer that the machines reach out to the internet if the cache server is unavailable, there is an option you can turn on called Cache Bypass. To enable/disable it, select the cell for the “Cache Bypass” column in the Machine Details view, and then in the left menu there will be an option to Turn On or Turn Off the Cache Bypass. Turning it on will allow the machine to reach out to the internet for updates if the cache server is unreachable.
Using Ninite with a proxy
If your computers use a proxy, you’ll need to make sure the Ninite Agent installed on your machines has that information.
If your proxy is set through Windows global proxy settings, then Ninite should pick that up automatically. Those global settings can be viewed/changed in Internet Explorer’s Tools menu by choosing Internet Options, then Connections, and then LAN settings.
If it is not set through the Windows proxy settings, you will need to provide it manually to the Ninite Agent at install time (if you have already installed the agent, you can uninstall it and then reinstall it with the proxy settings). To do this, you’ll need to first download the standalone .exe version of the installer and then run it with the /proxy switch.
"Ninite Agent Standalone Installer.exe" /proxy <proxy> <port>