Installing the Ninite Agent
General
Navigate to the Ninite Pro web interface and log in if necessary.
Ensure you are on the “Overview” tab.
Click the “Download” button located on the “Overview” tab.
Select the appropriate installer for your environment.
Choosing the Right Installer
If you are unsure which you need, we recommend you start with the .msi installer. The .msi installer is also appropriate if you want to distribute the Agent on a domain via GPO.
If you run into any difficulties with the .msi installer, we recommend the standalone .exe installer.
If you need to deploy the agent across a network or domain, but cannot use the .msi installer for any reason, you can try the networked .exe installer.
.msi Installer
This is the most commonly used installer. It can be run directly or deployed over GPO. If you aren’t sure what installer to use, you should probably start here.
Standalone .exe installer
This installer works similarly to Classic Ninite Pro, and so it might be a more familiar option for some customers. You can run it similarly to Classic Ninite Pro as well, because it supports the /silent switch for error output:
Ninite Agent Standalone Installer.exe /silent output.txt
Networked .exe Installer
This installer works similarly to Classic Ninite Pro’s “remote mode” and may be a more familiar option for some customers. You can run it from a single computer on your network and deploy the agent to the other computers on that network, rather than deploying the .msi via GPO. It uses the same /remote switch as Classic Ninite Pro:
Ninite Agent Network Installer.exe /remote ad:my.domain.com /silent output.txt
or
Ninite Agent Network Installer.exe /remote file:machines.txt /silent output.txt
where machines.txt is a file containing a line separated list of IP’s or hostnames, such as:
hostname1
hostname2
hostname3
Viewing the Success or Failure of the Agent Install
If you are using the .msi Installer, you can use the standard .msi
switches of /L*v.
If you are using the standalone .exe installer
or networked .exe installer, you can use the
Classic Ninite Pro logging switch of /silent output.txt.
Installing the Agent on a Domain via GPO
The agent installer .msi file can be deployed like any .msi via GPO. The only Ninite-specific considerations are to ensure your machines can access our servers, and that if you are using a proxy, you may want to review our proxy information first.
Uninstalling
Note that there is a difference between uninstalling the Ninite Agent from a machine, and deleting the machine entry from the interface. If the agent is still installed when a machine entry is deleted, then the machine will reappear in the interface when the agent next contacts our servers. You should only delete a machine from the interface if the agent has already been uninstalled, or the machine has been decommissioned or re-imaged.
If you are decommissioning a machine, or no longer wish to keep it up to date with Ninite, and/or want to free up that license, then you will want to uninstall the Agent, and then delete its entry from the interface.
If you are uninstalling the Agent in order to troubleshoot an install problem, then you do not need to worry with deleting it from the interface.
Uninstalling the Agent from a Machine
There are two options to uninstall the Agent.
You can uninstall it directly from Windows (via Apps or Add/Remove Programs).
You can uninstall it via the Ninite Pro interface.
The second option allows you to uninstall from multiple machines at once, and/or to uninstall the Agent remotely.
To uninstall via the interface, navigate to the Machine Details tab, select the machine or machines (any column),
and then click on the uninstall button in the left pane.

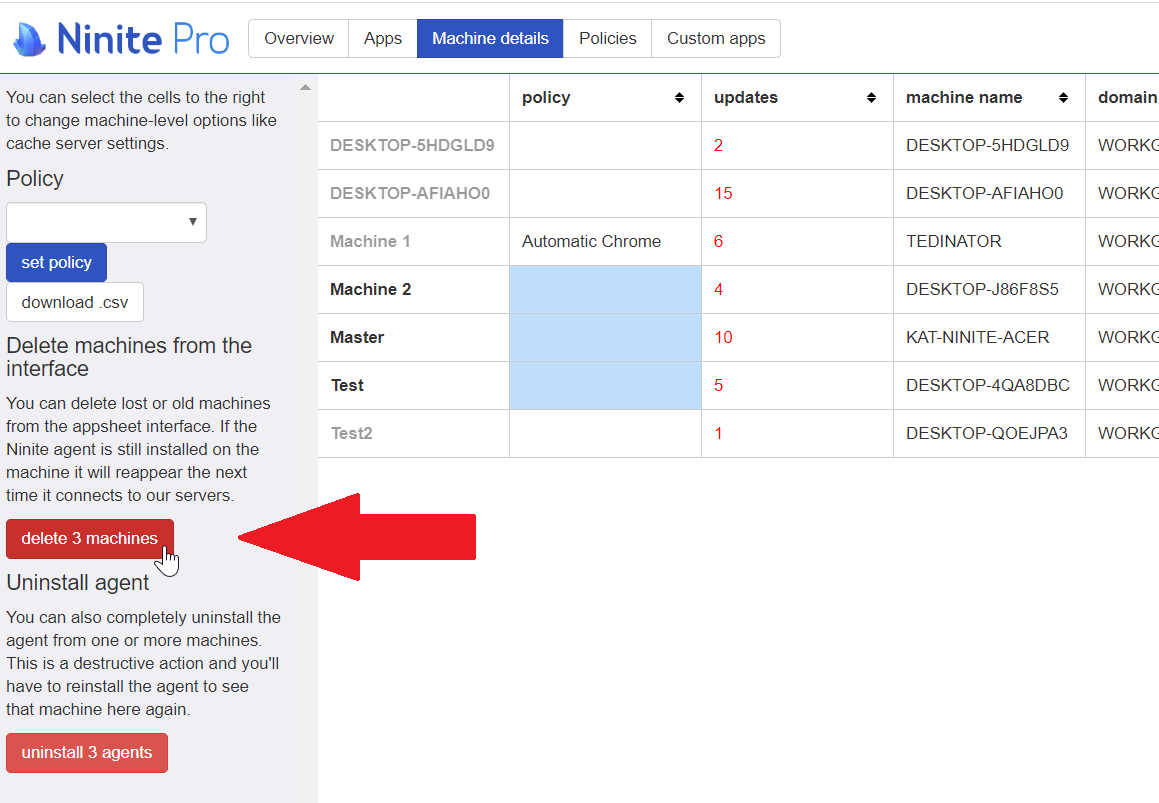
Deleting a Machine from the interface
To delete a machine, navigate to the Machine Details tab, select the machine or machines (any column),
and then click on the delete button in the left pane.